Staking (Pre-Metaverz)
Find out how to stake your Zombie Social Club NFT's in rewards for our native $BRAINZ token before we launch our in Metaverse staking feature.
Our Metaverse will have a cool staking feature within it but we won't be opening the doors for another 3 weeks, so we wanted to ensure that those in our community who want to start staking can take advantage of the 3 week period leading up to launch accumulating $BRAINZ for an awesome jumpstart into the ZSC economy. To safely and successfully stake your Zombie Social Club NFT's into the ZSC Community Vault to start earning $BRAINZ, please follow the following instructions carefully.
If you need any assistance then don't hesitate to express your need for support in our Discord. We've got an encouraging, supportive community so click here for your own invite. Before we get started, there's only a few things that you need to know. ⚪ This staking contract and $BRAINZ tokens earned will be exactly the same as in the Metaverse, this is just a way that you can stake your ZSC NFT's earlier and take advantage of the time lead. ⚪ For every 1 ZSC NFT that is staked, you'll receive around 38 $BRAINZ tokens per hour. ⚪ Tokens are burnable and are minted from the staking contract by the user when claiming the $BRAINZ rewards. ⚪ There currently is no hard cap on the supply of the $BRAINZ token, meaning that the circulating supply is dynamic and can be controlled when a stable economy has been established. ⚪ $BRAINZ tokens will be used as the Zombie Social Club base currency with swap to ETH and other crypto token functionality in the near future. ⚪ Tokens will be redeemed against Metaverse character items, physical merch, exclusive event items, whitelist spots for sought after projects, NFT's, Derivative collections and so much more.
So, let's get staking your Zombie Social Club NFT's. 1. You need to know which zombies your wanting to stake to earn $BRAINZ passively. Head over to OpenSea and in the top right hand corner, click on 'profile'. Find a zombie that you would like to stake into the ZSC Vault and locate it's ID. We're selecting zombies #531 and #529.
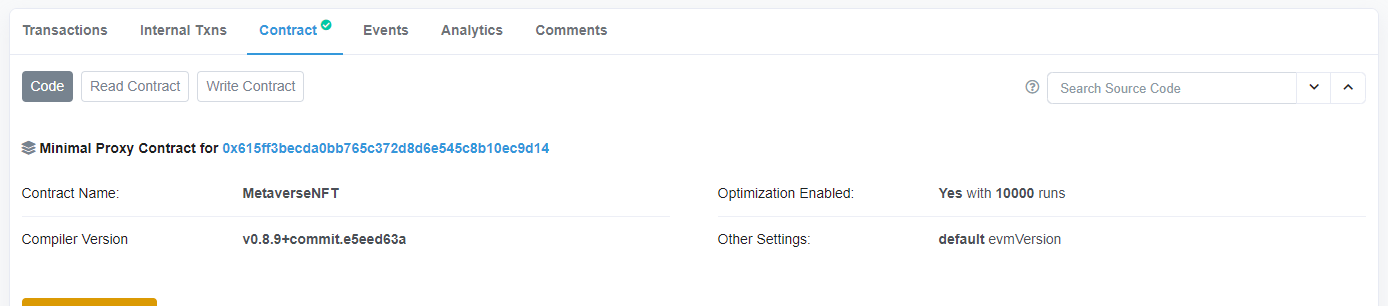
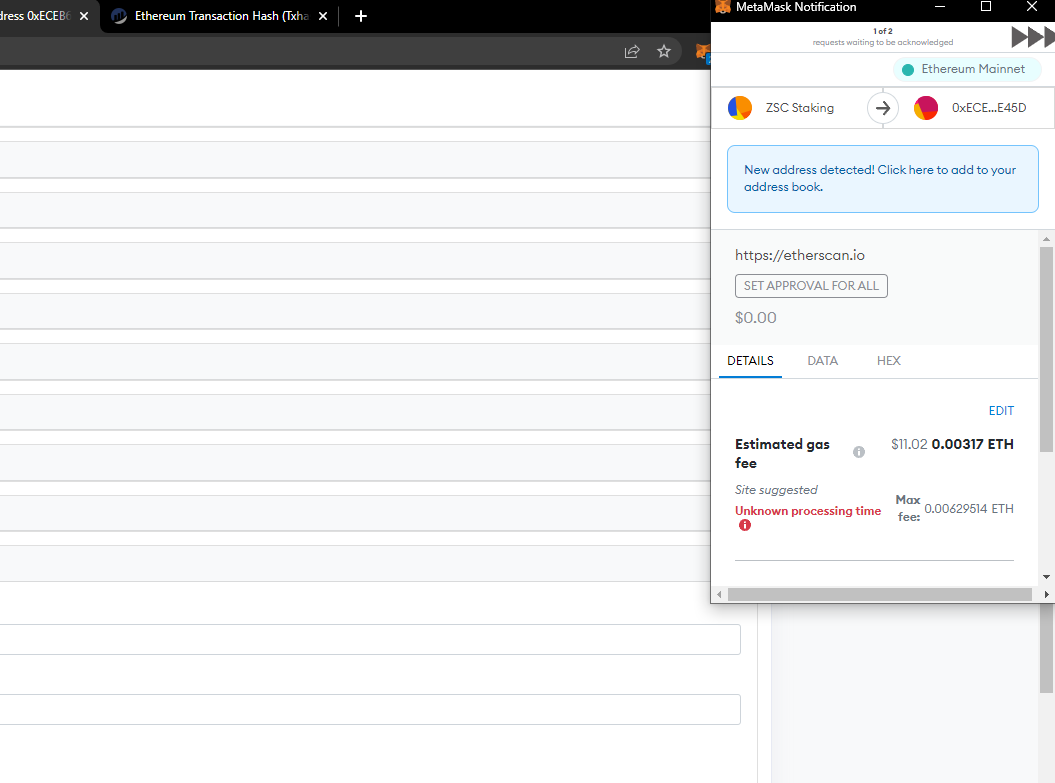
2. After you've located the NFT ID's, you will need to give permissions to the staking contract to use your NFT's by interacting with the ZSC NFT smart contract. Head over to the Etherscan page for our ZSC NFT Contract - https://etherscan.io/address/0xECEB6268F75174887a233112fc8bB9F8149CE45D#code
On this page, click the tab 'Contract' and then click on the button 'Write Contract'. You'll be on a screen like the image below and the only function we will need to be calling is 'setApprovalForAll'.
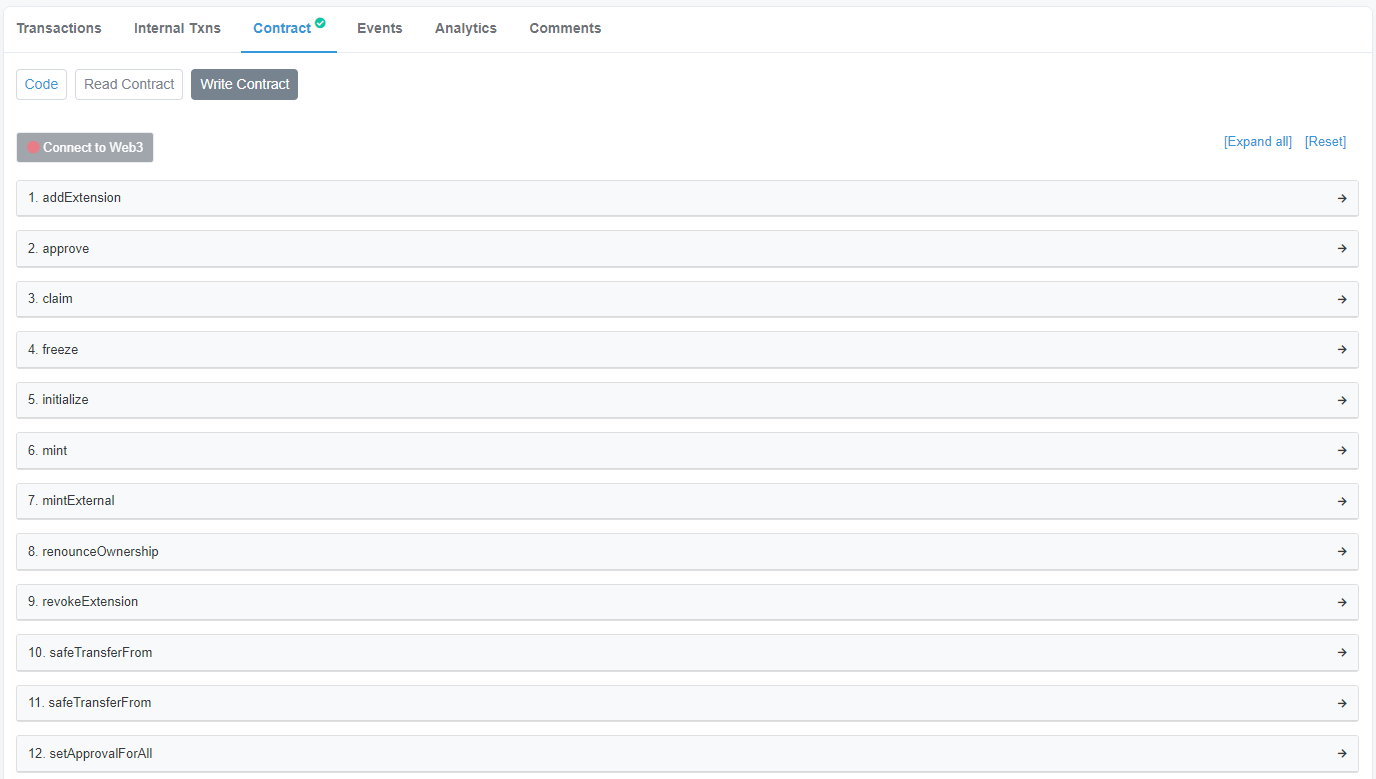
3. Click the 'Connect to Web3' button and connect the wallet that is holding your ZSC NFT's through the Metamask browser extension. When you are connected, you'll see the button now turns green and you are good to go.
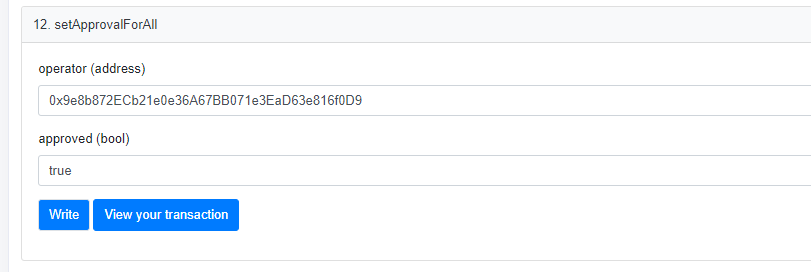
4. We now need to tell the ZSC NFT contract that it's ok for the Staking contract to use our NFT's by approving it so click on the 'setApprovalForAll' drop down menu and paste in the smart contract staking address: 0x9e8b872ECb21e0e36A67BB071e3EaD63e816f0D9. Then in bool type 'true'. Then click 'write' which will open Metamask to sign a transaction to confirm the access. This is a payable transaction but please note you'll only ever need to do this once with the wallet that is storing multiple ZSC NFT's and accumulating $BRAINZ.
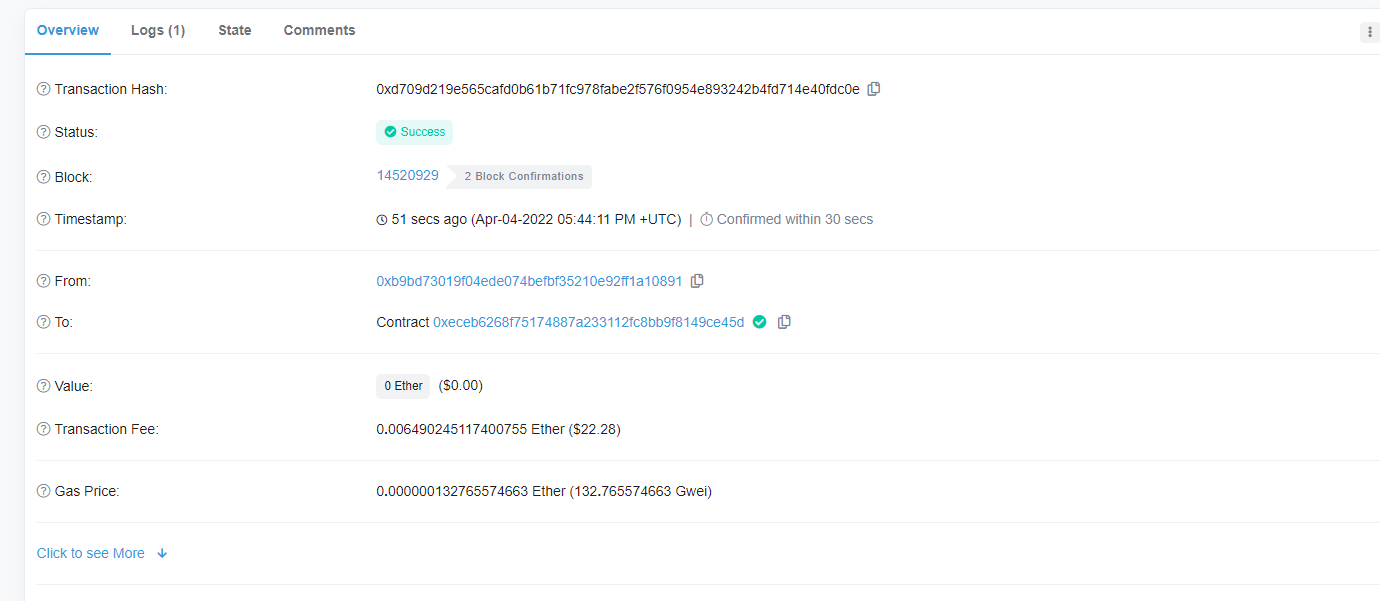
Once you've confirmed the transaction, click on 'View your transaction' to see it on the Etherscan block explorer.
You'll see something like this:
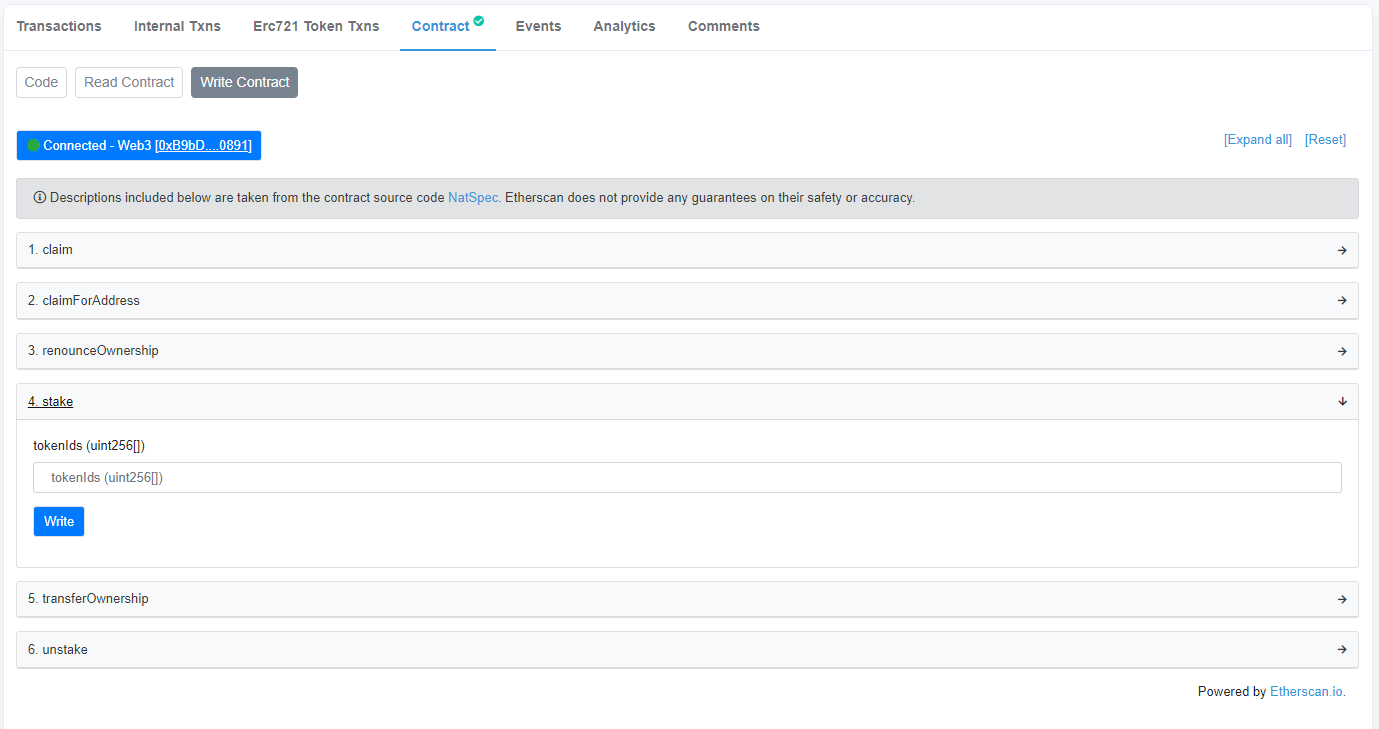
5. Once the block has been added to the chain and you see 'Success', you've successfully approved your wallet for staking ZSC NFT's. Next let's actually stake your ZSC NFT's. Head over to our ZSC Staking Smart Contract Etherscan Page and click on the 'Contract' tab, then the button 'Write Contract'. https://etherscan.io/address/0x9e8b872ECb21e0e36A67BB071e3EaD63e816f0D9
6. Let's ensure we're again connected to the smart contract through our Metamask browser extension. Click on the 'Connect to Web3' button again and select the correct wallet. Then navigate to the 'stake' function drop down below.
This is where we need to define the NFT's that we want to deposit into the ZSC Vault to earn $BRAINZ tokens passively. When we are depositing our ZSC NFT's into the vault through calling the 'Stake' function and 'Claim' function, you'll want to know that you can do either single or multiple deposit's or claim's in one go... or simply everything. By using the format [1] with the number being your TokenID, you'll just claim or stake that specific ID. If you wanted to stake or claim for 3 ZSC NFT's, you'd use [500,501,502]. If you'd like to claim or stake every NFT that you have, simply include every ID separated by a comma enclosed in brackets. There is also an 'unstake' option on this page which can be called by using the same format, again either singularly or multiple at a time.
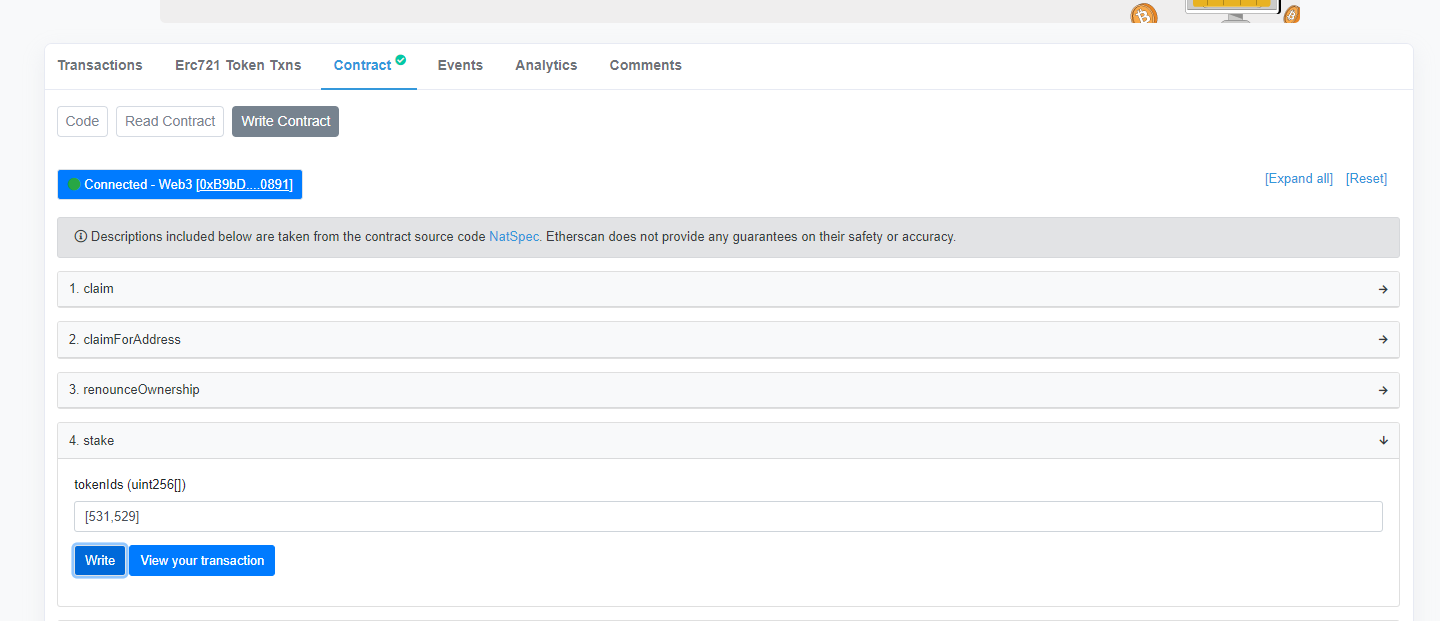
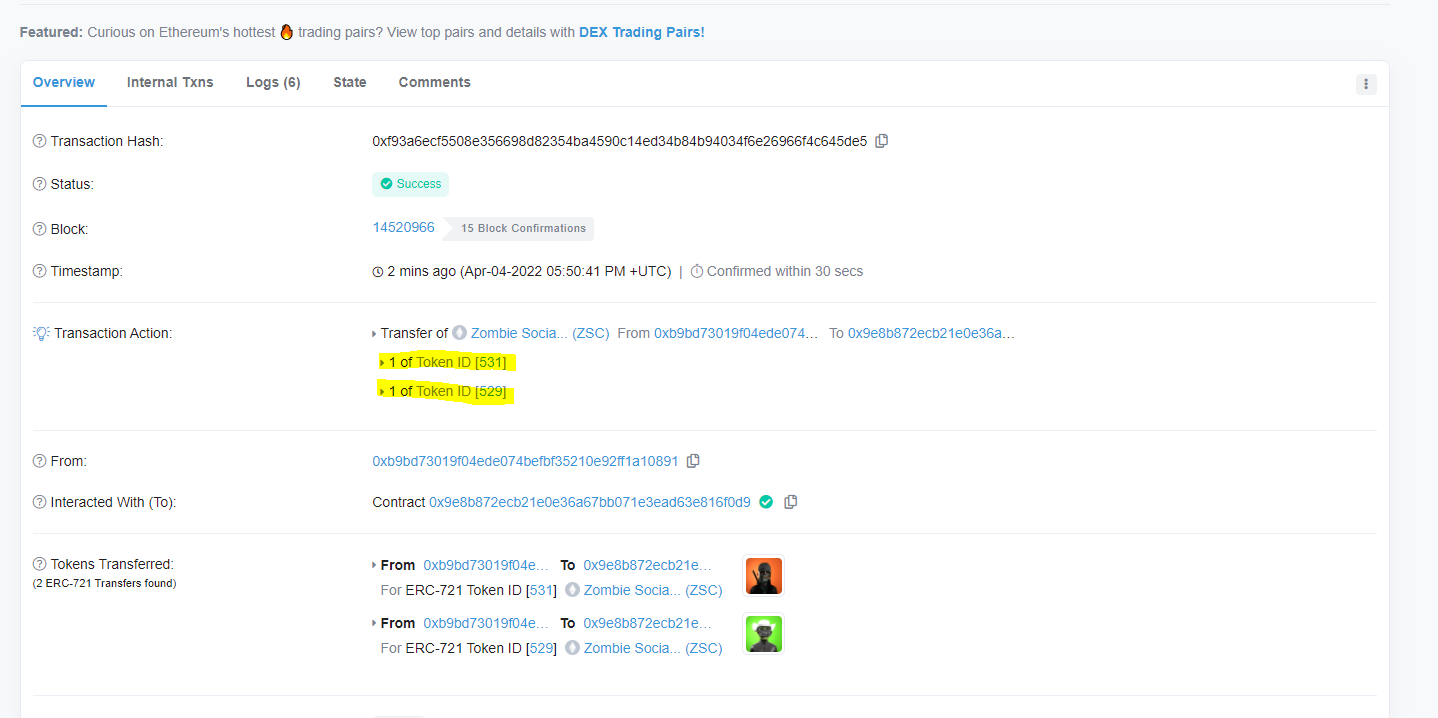
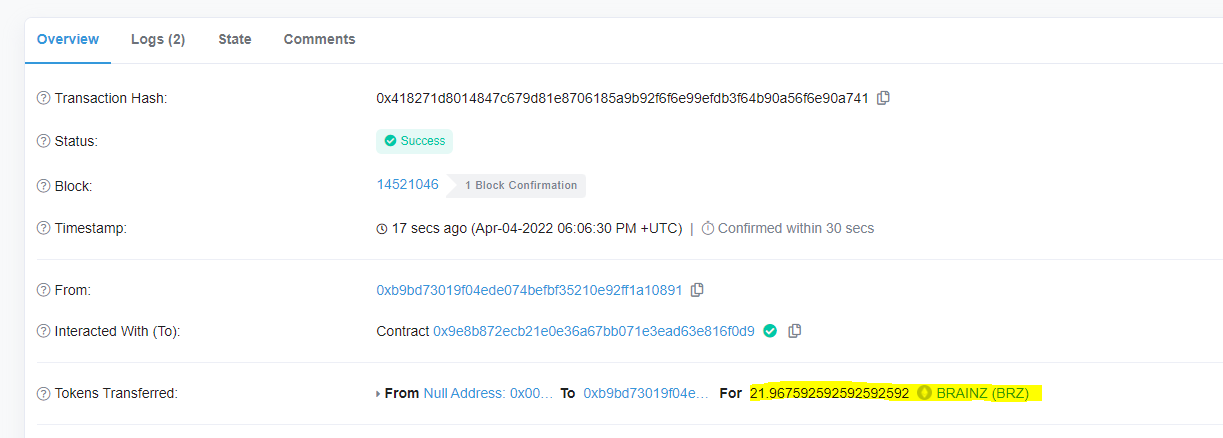
7. As you can see, we've deposited NFT's #531 & #529 into the ZSC Vault and can view our transaction by clicking the 'View your transaction' button. We've already confirmed ours so let's take a look at what's happened.
In the 'Transaction Action' portion of this block explorer, we can see that the staking contract has withdrawn the ZSC NFT's from the user wallet and deposited them into the vault. As soon as the transaction completed, you started earning $BRAINZ tokens, CONGRATULATIONS!!!! 🎉🎊
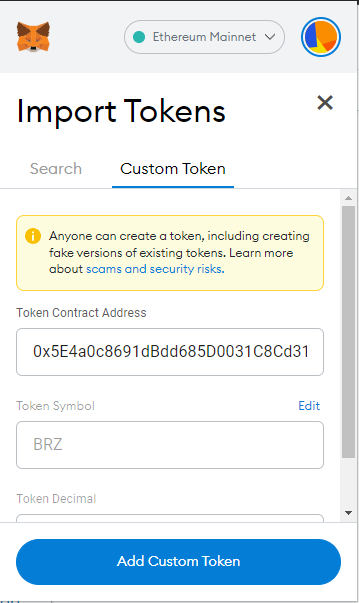
8. Let's import our $BRAINZ token address: 0x5E4a0c8691dBdd685D0031C8Cd31Bc298F0F2C6f into Metamask so we can view our token once claimed. To do this just open your Metamask extension or app on mobile, scroll to the bottom of the landing page when open and locate the 'import tokens' option.
9. Let's import our $BRAINZ token address: 0x5E4a0c8691dBdd685D0031C8Cd31Bc298F0F2C6f The token symbol and decimals should automatically be filled out. Once done, click add custom token.
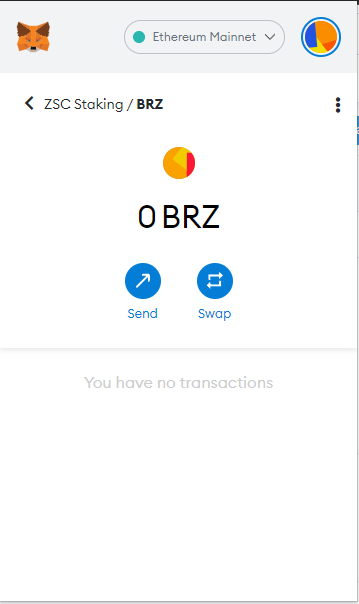
Once you've imported it, you should have 0 BRZ which is the abbreviation for $BRAINZ. Don't worry, you are currently earning so let's start a claim of tokens against our staked NFT's to see how much $BRAINZ we've accumulated in this short amount of time. We suggest only claiming 2-3 times a month to avoid continual and unnecessary gas fees.
10. Lastly, head over to our ZSC Staking Smart Contract Etherscan Page once again and click on the 'Contract' tab, then the button 'Write Contract'. https://etherscan.io/address/0x9e8b872ECb21e0e36A67BB071e3EaD63e816f0D9 As when we staked our NFT's we used a specific format, we will use the same format again when claiming to ensure we're claiming the $BRAINZ earned for both staked NFT's.
You will now see your passively earned $BRAINZ tokens to be spent, traded, gifted and more across the Zombie Social Club Metaverse.
We hope the tutorial on staking was useful, please remember to stay safe whilst exploring blockchain technology and use best practices provided by Ethereum.org Ξ https://ethereum.org/en/learn/ OFFICIAL LINKS: Website: https://www.zombiesocialclub.com/ Mint: https://www.zombiesocialclub.com/ OpenSea - https://opensea.io/collection/ogzsc Twitter: https://twitter.com/SocialZombie ZSC Smart Contract: https://etherscan.io/address/0xECEB6268F75174887a233112fc8bB9F8149CE45D#code ZSC $BRAINZ Token Smart Contract: https://etherscan.io/token/0x5E4a0c8691dBdd685D0031C8Cd31Bc29 ZSC Staking Contract: https://etherscan.io/address/0x9e8b872ECb21e0e36A67BB071e3EaD63e816f0D9
Last updated